Protecting Cable Harness With Wire Loom

No matter where your cables are set, keeping them in good protection is always helpful for extending the cable service life. As we know, it is more difficult to arrange the harness cable due to the multiple strings. However, a better protection and management is necessary all the time. Thus, a cable manager named wire loom is designed to meet the demands. This device efficiently arranges and protects the cables at the same time. A growing number of applications are adopting the wire looms for harness cable routing.

What Is Wire Loom?

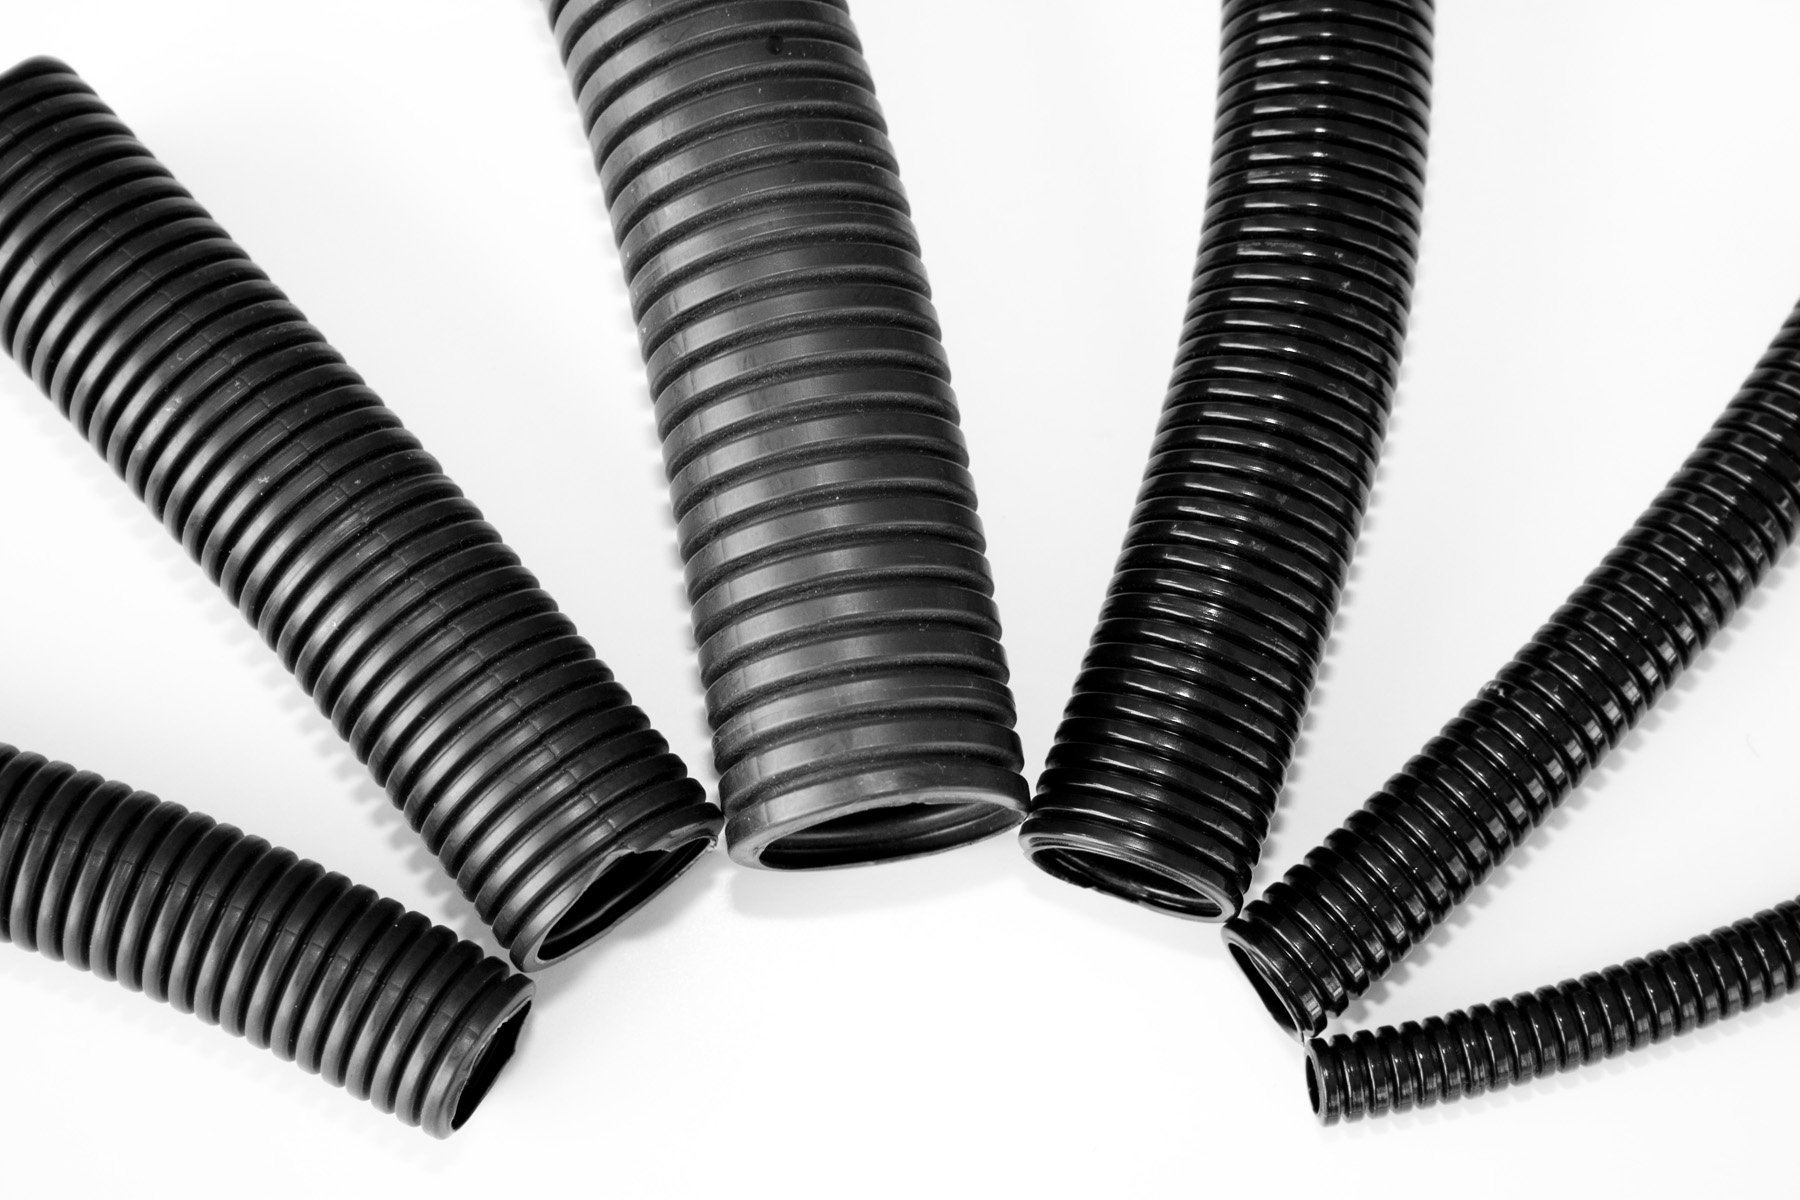
Wire loom, also known as convoluted tube, is a corrugated pipe-shaped cable organizer widely used for cable harness protection. It can be made of several materials, such as polyamide (PA), polyester (PET), polypropylene (PP), polyethylene (PE), polyurethane (PUR) and elastomer. You can find the applications in a variety of industries, including automotive, agriculture, construction, marine and telecommunications. The inside diameter is also optional to suit the size of cables, and common diameters are 3/8”, 1/4”, 3/4”, 1/2”, 1” etc. The following picture shows the general look.

wire loom

How to Choose Wire Loom?

There are three aspects that you can consider when selecting the wire loom. Firstly, you can look over the design of wire loom to decide whether it needs to be split, non-split, spiral wrap or self-wrapping. Typically, split ones are the standard type preferred by most applications. Secondly, as mentioned above, the size is optional, thus you need to choose the right size to fit your wires. You can measure the wire bundle diameter in advance and then make sure it to be a little larger than the wire bundle. Thirdly, you should select the material based on the installation environment so as to give better protection for the cables. Temperature, moisture, chemical, vibration and other elements can all be taken into consideration during the selection.

Benefits of Wire Loom

It is surly a cost-effective solution to use wire loom for cable harness protection. The install and removal of is very flexible and easy, especially for split wire loom. Most importantly, it is resistant to various abrasions (friction, vibration, fraying and puncture), fluids (automotive fluids, water, snow, salt and ice) and weathers ( heat, cold and sunlight). Apart from these, using it also ensures the cable management to be neat and clean, which is important to the higher performance of cables.

Related Wire Loom Products

Besides the standard wire looms, there are also other related products that can provide easier deployment.

Colored Wire Loom

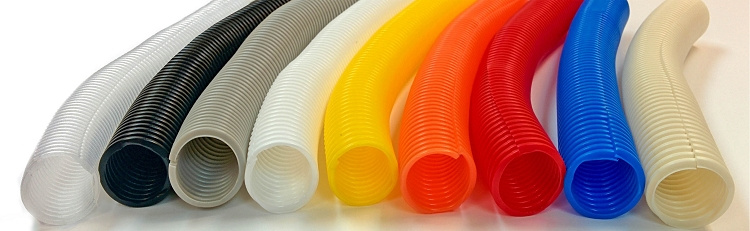
The typical color is black, but there are also other color choices, such as red, white, blue, yellow and so on. These colored wire looms can be seem as the ornament for the installation area, especially when the they are used at people’s houses. In addition, it is simpler to distinguish different cable bundles when multiple wire looms are used in the same place.

colored wire looms

Wire Loom Connector

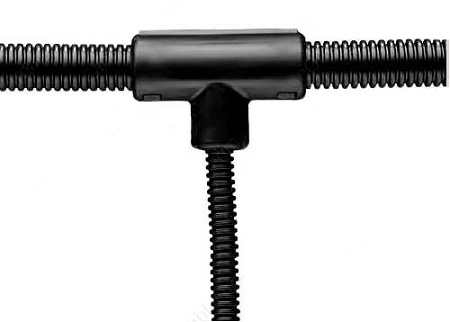
Wire loom connector, namely wire loom tee, is used to offer safe branching of cables. It can connect three pieces of wire looms with a simple snap. The nylon and TPE rubber material designs secure the junction area to be protected from high temperature and abrasion. Different branch diameters are also available within one connector to provide convenience for the connection of different size.

wire loom coonector

Conclusion

If you are seeking for a better protection for your fiber cable, wire loom is an ideal solution that can be used for all kinds of cabling applications. FS.COM provides different colors and sizes of wire looms and connectors. Please visit our website for more detailed information if interested.

How to Organize Fiber Cables With J-Hook?

When managing large amount of fiber cables, using a cabling pathway is very useful to provide better support for the cables. Common pathway systems are usually structured with conduits, cable trays, ladder racks, surface raceways, and underfloor ducting systems. Construction materials can be made of steel, aluminum, fiber glass or plastic. However, it is not that necessary to lay every inch of cable on top of a support element. Lots of pathway materials can be saved for other important applications. Is there any solution can both save the construction material and provide continuous support for the cables? The answer is yes. J-hook system perfectly solves the issue with greater flexibility and simpler installation. This article is going to present some basic information about J-hook.

What Is a J-Hook?

The name comes from its side view of the letter “J” with a semi-circular bottom section. Cables can be put in the rounded gaps between J-hooks for a continuous support. J-hook is also designed with smooth beveled edges which provides a large bending radius for fiber cable. It is widely used for indoor and outdoor applications providing a speedy and easy installation.

j-hook

Common Attachments of J-Hook

J-hook can be fitted with many kinds of attachments allowing for a more flexible use. The followings are some common fitting types for wall-mount J-hook.

J-Hook With Angle Bracket

Using the 90-degree angle bracket, J-hook can be fastened onto the ceiling. It is also an effective solution for cable trays. This attachment can be easily installed or removed as you want.

J-Hook With Beam Clamp

This attachment can install J-hook to the horizontal flanges with the knock-on beam clamp. It allows for up to 1/8 inch flange thickness. In addition, J-hook with beam clamp is able to rotate 360 degrees to support all directional cable runs.

J-Hook With Hammer-On Clip

Hammer-on clip attachment fitting can be quickly installed with only a hammer. It is also able to swivel 360 degrees for various directional runs of cable.

J-Hook With Wire/Rod Clip

Wire/rod clip is also known as bat wing clip due to its bat shape. It attaches the J-hook to a wide variety of structures. The clip can snap onto the wire that holds up ceiling grids, thus the cable can be suspended at any position in a plenum space.

j-hook-attachment

Steps for J-Hook Installation
  • Step 1, fasten J-hook with the right attachment. It depends on where the J-hook is located. Wall, stud, beam, flange and drop-wire mounting are the common supporting structures.
  • Step 2, align snap lock attachment of J-hook with holes of the chosen bracket and snap J-hook into position.
  • Step 3, lay the cable in J-hooks. The intervals between J-hooks is around 1.2 to 1.5 m.
  • Step 4, look over your installation to ensure the cables are neatly laid on the J-hooks.
Benefits of J-Hook

Compared with traditional pathway elements, J-hook is easier to install and move on-site without the need for special tools. A variety of attachment types enable the flexibility of J-hook to be placed at different locations. There is more headroom capability when using J-hooks. Its wide-base design also maintains the bend radius of large diameter cables.

Conclusion

J-hook is absolutely a simpler solution for horizontal cabling support. Different from other continuous support systems, J-hook system is more economical with fewer logistical demands, less installation labor and reduced material cost. Since it can be used in multiple environments and applications, more and more cabling projects have been adopting J-hook system for construction.

Importance of Using Fiber Color Codes in Data Center

The utilization of fiber color code in data center effectively helps technicians make better cable management and reduce human errors. Without redundant checking process, people can easily get the information of the device by only one look. Making good use of the color code system can surely save much time during work. This article will mainly present the widely accepted color code system and its important functions.

fiber color code

Introduction to Fiber Color Code Systems

Fibers, tubes and ribbons in fiber optic cables are usually marked with different color codes to facilitate identification. There are many color code systems for national or international use. All these systems are characterized by using 12 different colors to identify fibers that are grouped together in a common bundle such as a tube, ribbon, yarn wrapped bundle or other types of bundle.

Different color code standards may be used in different regions. For example, the S12 standard is used for micro cables and nano cables in Sweden and other countries. The Type E standard is defined by Televerket and Ericsson used in Sweden. The FIN2012 standard is used in Finland, etc. However, there is one color code system widely recognized in the world, namely the TIA/EIA-598 standard.

Specifications of TIA/EIA-598 Color Codes

The following picture gives the fiber color coding of TIA/EIA-598 standard. If more than 12 fibers or tubes are to be separated, the color sequence is normally repeated with ring marks or lines on the colored fibers and tubes. As for the fiber cable jacket, orange, yellow, aqua and black color codes are used for their distinction.

color-code-system

Functions of Fiber Color Code in Data Center
Distinguishing Fiber Grades

As mentioned above, the outer jacket color codes are able to identify the fiber grades. OM1/OM2 cables often adopt the orange jacket, OM3/OM4 cables with aqua jacket, single-mode cables with yellow jacket and hybrid cables (indoor/outdoor cables and outside plant cables) with black jacket. One thing to note is that the mix of OM1 and OM2 or OM3 and OM4 cables may be troublesome. You should make sure not to mingle these cables with the same color code.

Identifying Fiber Patch Cords

Using fiber color code to label fiber patch cords can reduce the potential for human error. For instance, you may highlight mission-critical patch cords in red, and then teach all technicians that a red patch cord should only be moved with proper authorization or under supervision. Likewise, keeping the fiber connector color consistent with fiber grade color standards will make it simple for technicians to use the right connectors with the cables.

Separating Different Ports

The color-coded port icons can be helpful in identifying different network routings in accordance with internal needs. By tagging each patch panel port, you can simplify and streamline network management.

Differentiating Connector Boots

You can use fiber color code on connector boots to make routine maintenance and moves, adds and changes easier by helping technicians preserve correct parallel groupings for switch ports. If you change your connector color, you need to ensure that your fiber cable color represents the fiber grade to avoid confusion. You can also change the color of a connector boot to differentiate between different aspects of the network, making it easy for technicians to view the contrast within a panel.

Conclusion

Visual management is more intuitive for specialists to supervise the data center. Color code system has provided an ideal and easy way to solve the cabling problem. Inside the cables, the fiber buffers are also color-coded with standard colors to make connections and splices easier. Therefore, if you are still bothered by these issues of fiber patch cables, using the fiber color code system is a good way to go.

Related Articles:
How to Identify the Color Codes?
Fiber Patch Panel Color Codes

Suggestions for High-Density Cable Management

People who work in data centers are familiar with cable management. Terrible cable management destroys the stability and availability of networking, especially for high-density applications. Since the advancement of technology brings us to a higher broadband network, high-density components are widely applied to data infrastructures. The importance of high-density cable management should be valued.

Useful High-Density Cable Management Components

Using the right devices for high-density connections will ease the difficulty of cable management. High-density patch panels, high-density TAB patch cables and high-density trunk cables are recommended for high-density installations.

High-Density Patch Panels

High-density patch panel provides fast, intuitive and easy deployment of high-density interconnects and cross-connects in data centers. They also conserve valuable rack space. Compared to standard patch panels, angled styles can facilitate cable management practices. Omitting the necessity of buying new components, reconfigurable panels with various mounting and attachment features can ensure that patch panels are fit for your data center configuration. For instance, the following picture shows an ultra high-density angled patch panel with 144 ports highly welcomed by the high-density network application.

cable management patch panel

High-Density Patch Cables

High-density cabling has been increased because of the deployment of higher network speeds. Installing cables with smaller overall diameter into dense patch cord trays can save lots of space to improve cable management. The high-density optical fiber also provides better airflow to maintain consistent operating temperatures, reducing the likelihood of failure or downtime. Finger access to each patch cable becomes more difficult as cable density increases. To ensure easy access, looking for high-density patch cords that are easy to remove is important. Thus, the patch cable using a flexible pull-tab efficiently solves the issue. These tabs can help increase cabling density and maintain reliability, preventing you from accidentally loosening surrounding connectors as you access the patch cable you need. The picture below is a typical HD TAB fiber patch cable.

high-density-patch-cable

High-Density Trunks

High-density trunks allow tighter trunk cable bends for slack storage and routing. Less space is consumed and installation is easier when using high-density trunks that offer smaller transitions. Cable pulling and cable management are improved when a cable with a smaller overall diameter is used. High-density trunks should also be marked for fast fiber type identification.

high-density-trunks

Things to Avoid During Installation & Daily Practices

  1. Avoid over-bundling the cables or placing multiple bundles on top of each other, which can degrade the performance of the cables underneath. Additionally, keep fiber and copper runs separated. The weight of the copper cables can crush fiber cables that are placed underneath.
  2. Avoid routing cables through pipes and holes. This may limit additional future cable runs.
  3. Avoid mounting cabling components in locations that block access to other equipment inside and outside the racks. For example, blocking the cooling fans will restrict airflow.
  4. Avoid leaving loose cables on the floor; this is a major safety hazard. Use the horizontal, vertical, or overhead cable managers.
  5. Avoid exposing cables to direct sunlight and areas of condensation.
  6. Avoid mixing different cable types within a bundled group.

Summary

In conclusion, a good cable management of high-density devices is very essential to extend their service life. Choose the right components will also facilitate the efficiency of cable management. There is no perfect solution for all your cable management demands. Some suggestions may help you to a certain degree, but you should still arrange your equipment according to the actual environment.

Have You Chosen the Right Cables Ties?

You can frequently find racks, frames or panels in the cabling system. They are necessary components for cable management. However, sometimes you may easily forget about a small but helpful tool for cable management – that is cable tie. People’s first impression about cable tie is always a self-locking and colorful plastic strip. They think cables ties are pretty much the same. Seldom have they considered about whether they are choosing the right or not. In fact, cables ties have many different distinctions in construction, material, color, size and some special features. So do you want to know if your selection is right? Don’t worry. The following parts will give the explanation.

cable ties

Cable ties have to be able to meet the most varied demands these days as they are used in the widest range of operations – from the simple bundling of cables with cable ties to the absolutely specific use of cable ties under extreme conditions. Thus, many factors are taken into consideration during the design of cable ties.

Cable Tie Construction

Cable ties can be classified as either one-piece or two-piece construction. One-piece cable ties typically have a plastic locking device molded into the head of the tie. The locking device ratchets the notched strap to tighten and lock. This design has a lower cost of manufacturing and is used for general applications around home or office. Compared to one-piece cable ties, two-piece cable ties are with higher performance. They consist of a stainless-steel locking device embedded into the head of the tie, and a smooth locking strap. This design offers high tensile strength, and resistance to mechanical and environmental stress for applications that require greater performance than what a general cable tie offers. In addition, the smooth, infinitely adjustable strap also allows for the exact bundled tightness. The head of the two-piece cable tie engages the strap when installed, and permanently locks in place. With a lower profile and smoother cross-section, the uniform cross-section distributes stress across the strap more evenly than with one-piece cable ties. Thus, the two-piece cable ties are more resistant to brittleness and breakage in harsh environments, particularly appropriate for harsh conditions, such as ultraviolet exposure, extreme temperature, and exposure to moisture or chemicals, as well as for applications where retrofitting is not an option.

Cable Tie Material

The material design of different cable ties also needs to consider for different applications, such as occurring indoors or outdoors; the environment’s temperature range; the presence of moisture, chemicals and radiation; flammability issues; and cost. Cable ties are available in a wide range of materials, each with its own specific properties. Among them, the most common type is nylon cable ties. Nylon ties can offer good resistance to weather and ultraviolet rays in lower temperatures. In addition, for applications in harsher environments that require extra durability in the face of heat, chemicals and other corrosive elements, there are stainless-steel cable ties.

Cable Tie Color

The most commonly used cable ties are white and black. But colorful cable ties are also popular with users. These cable ties with rainbow colors are very useful when you are trying to color-code your cables, or just want to match the ties to your equipment. Moreover, you can use different cable ties to mark different cables bunch which is convenient for cable management.

Cable Tie Size

When using cable ties, you should also consider the size and shape. First, be sure to measure the diameter of the cable bundle you’ll be tying and decide the length. In general, to buy cable ties with a little longer length is better. Because no one wants to find out at the last minute that the cable ties are too short to use. In addition to length, width or shape are also important considerations to choose optimal cable ties for your cable bunch.

Cable Tie Special Features

Though the standard-design cable ties can meet most of our requirements, sometimes, we still need something special for special applications. For instance, most cable ties lock permanently, but sometimes, we would prefer to looking for a solution that cable ties can be undone without actual cutting. Then, releasable cable ties have been launched in the market. In a releasable cable tie, the built-in locking tab can actually be disengaged, allowing the tail end of the tie to be pulled free from the head. Releasable cable ties tend to cost a little more than the standard type, but they save money and are more eco-friendly in the long run because you can reuse them over and over instead of just throwing them away. Additionally, for different special applications, there are mounted head cable ties, marker ties, etc.

Conclusion

It is very unprofessional to use random cable ties for your cable management. Knowing the secrets about cable ties can lead you to choose the matching cable ties for your applications. This will greatly reduce the unnecessary problems during actual practice. Actually, no matter cable ties or other assembles, each component of cabling system should not be underestimated. The right selection will greatly increase the efficiency of a cabling system.