Home Server Rack Setup: Making Your Home Intelligent

As we know, the server rack can organize numbers of network equipment into standard-sized rack, which greatly improves the working and management efficiency throughout the data center. Meanwhile, with the 5G IoT era approaching, more and more intelligent home appliances gradually enter our lives. People especially the IT men desire to use a centralized management to run these equipment. Of course, the best solution is the home server rack. But how much do you know about home server rack setup?

smart home

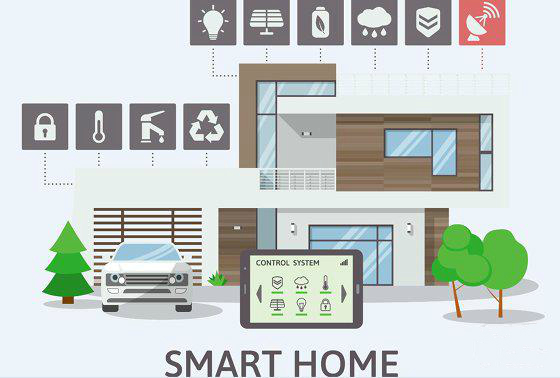
Figure 1: Intelligent Life is Coming.

What Can I Do With Home Server Rack?

Home server rack is the centralized point in your house where the wiring meets switches, routers etc. The most obvious thing that we can do with home server rack is protecting our hardware. Mounting them into the rack instead of putting them on or under a desk can avoid the risk of getting knocked over, having water or other liquids spilled on them. Besides, for the IT passionate and technology enthusiasts, they can use home server rack to build a small data center. With this, they can control and add whatever they please, like installing some game servers and email server in the meantime. So they can build their own services and have fun in running the services.

Considerations of Home Server Rack Installation Guide

As for the home server rack build, here are two aspects that must be considered so as to make sure everything goes smoothly.

Equipment numbers. Before you start the home server rack setup, you should take an inventory of your equipment such as switches, routers. Only know the specific numbers, we can determine the home server rack size. And here I suggest leaving some extra rack space, which is beneficial for cables go through the patch panel rack.

Rack location. We should determine the rack location based on convenience and available space. Because all the interior wiring like Cat5e, Cat6 for network and coax for television may join the home rack. Besides, an airy room is good for rack cooling. Thus choosing the right place in your building is critical.

How to Set Up a Server Rack?

Unlike the racks in the server room, there is no need to use a large server rack at home. So some people are fond of DIY. But I think to make a server rack may spend lots of time and energy. And most of them use the wood as the main material, which is not good for protecting the environment. Here I recommend the 12U server rack from FS.COM to you. Only cost 110 dollars, you can get a server rack that can be mounted on walls and placed on floors. It uses SPCC cold roll steel, which is more sturdy and durable than the wood ones. This equipment is specially designed with glass door to offer a better protection for your network devices, and cooling vents on the back to ensure airflow.

home server rack setup

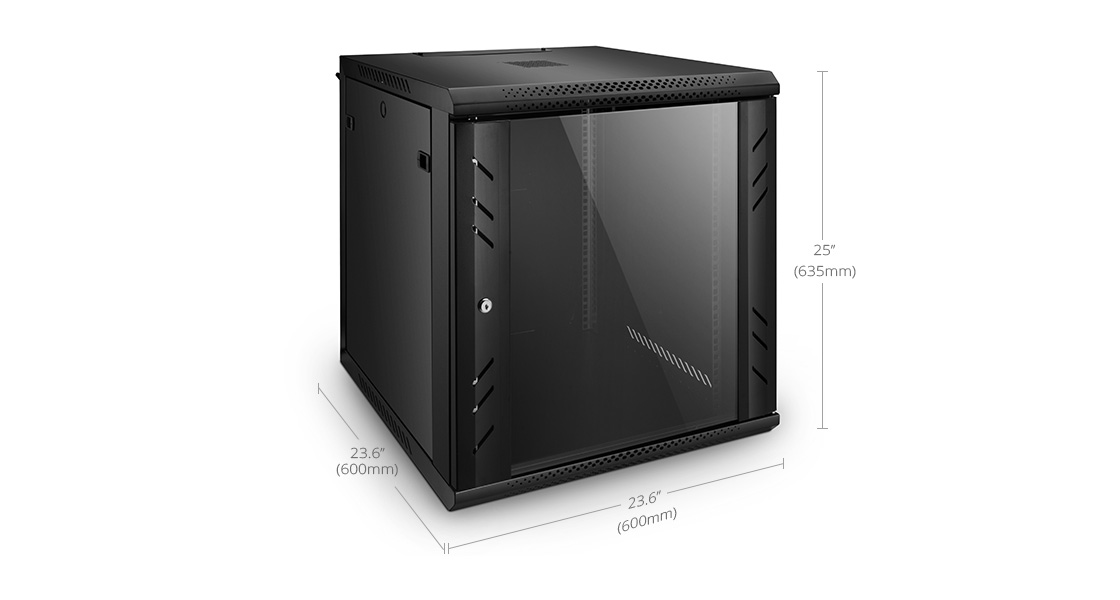
Figure 2: Server Rack for Home

Now, we can place the 12U home server rack in the determined location. Then mount your various devices into the rack. If you have a budget for cable management tools, you can buy a keystone patch panel to manage your cables on racks. Thus, a home server rack setup has been established, you can manage your home network devices conveniently and enjoy the customized services.

Conclusion

Home server rack brings many advantages which may make your life a lot easier and intelligent. After all the work in home server rack setup, you can pride yourself in the creation and effort. So let’s design a home server rack, and start our smart life.

Create Your Structured Cabling Solutions

Have troubles in vertical or horizontal cable management in your data center? Confused at the cables’ destinations and start points? With slack cables hanging here and there in server rack, blocking and pathway? Well, all these issues brought by point-to-point cabling will become the thing of the past as the structured cabling comes into being.

What Is Structured Cabling?

Before the 1990s, data and cabling system were proprietary which means they were vendor specified, each vendor had his own cabling system design and it was hard to have products from different vendors to work together. In the mid 1980s, the EIA was asked to develop a specification that would encourage structured standardized cabling. In 1991 the TIA published the first version of the commercial building telecommunications cabling standard, better known as TIA/EIA-568.

In the United States, we follow TIA/EIA-568-C as the structured cabling standard. It covers subsystems of structured cabling, installation methods and practices, connector and pin assignments, media types and performance specifications for horizontal and backbone cabling, connecting hardware performance specifications, recommended topology and distances, and the definition of cable elements (horizontal cable, cross-connects, telecommunication outlets, etc.)

structured cabling solution

How to Design Your Own Structured Cabling Solution

Presume that we have an empty building of four storeys, we need to design a structured cabling solution for different uses in it. One solution we must apply, also one of the subsystems of structured cabling, is horizontal cabling which can not be skipped in each floors. Horizontal cabling is the cabling that extends from horizontal cross-connect or main cross-connect to the work area and terminate in telecommunications outlets. Horizontal cabling includes the following: 1.Cable from the patch panel to the work area; 2.Telecommunications outlets; 3.Cable terminations ; 4.Cross-connections(where permitted); 5.A maximum of one transition point; 6.Cross-connects in telecommunications rooms or enclosures.

Furthermore, to achieve the connection between different floors, we need the backbone cabling, also known as vertical cabling. We can adopt it to to connect entrance facilities, equipment rooms, and telecommunications rooms and enclosures. Backbone cabling consists of not only the cables that connect the telecommunications rooms, equipment rooms, and building entrances, but also the cross-connect cables, mechanical terminations, or patch cords used for backbone-to-backbone cross-connection.

The work area is where the horizontal cable terminates and wall outlets also called the telecommunications outlet. In the work area, the users and the telecommunications equipment connect to the structured cabling infrastructure. The work area begins as a telecommunications area and includes components such patch cables, modular cords, fiber jumpers, station equipment such as computers, telephones, fax machines and so on.

The telecommunications rooms and telecommunications enclosures are the location within the building where cabling components such as cross-connects and patch panels are located. These rooms are where the horizontal structured cabling starts from. The telecommunications room and enclosure may also contain networking equipment such as hubs, switches, routers, etc.

The equipment rooms is a centralized space specified to house more sophisticated equipment than the entrance facility or the telecommunications rooms. Most often, telephone equipment or data networking such as routers, switches, and hubs are located there. Backbone cabling is specified to terminate in the equipment room.

The entrance facility specifies the point in the building where cabling connects with outside world. All external cabling such as campus backbone, inter-building, and telecommunications provider should enter the building and terminate in a single point.

Digital data is growing faster than any other commodity and its importance to businesses of all types cannot be underestimated. To learn how you can use structured cabling to better manage your data center, contact the experts at FS.COM.