The horizontal cable management solutions are springing up one after another as is expected. After the the explanation of versatile fiber optic patch panel, punch down patch panel, upgraded fiber enclosure, and various cable managers such as brush strip cable manager, finger duct cable manager, horizontal and vertical manager, we now focus our eyes on the new horizontal cable manager with D-rings.
The Structure of D-ring Horizontal Cable Management Tool
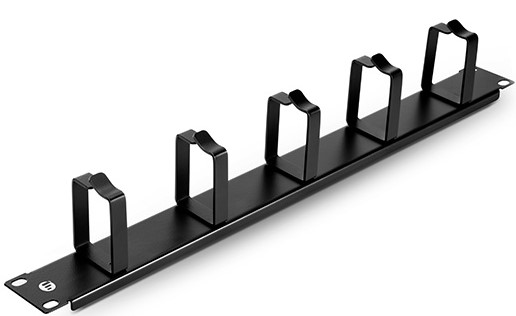
The name “D-ring” stems from its design that a ring goes in “D” frame. The five metal D-rings stand vertically on the cable management panel in a good order. Without complicated design, it won’t add unnecessary trouble in the cabling procedure or additional energy for you to identify each gadgets. For 1U cable management, we have 1U horizontal cable management with D-rings, and 2U horizontal cable manager with D-rings for 2U cable management.
The Advantage of D-ring Horizontal Cable Management Tool
Why is the D-ring horizontal cable manager standing out among all those cable managers? Why you want choose it? Look here.
For those who want neat and clean cable management, it perfectly caters to their need as it uses a D-ring method of cable management to run cables vertically along the side of your rack, neatly guiding them between equipment that’s mounted at different heights. This provides a tidy and well-organized way to run cables from devices mounted toward the bottom of your rack to other devices mounted near the top, without leaving a mess of cables hanging in between.
For those who long for easy installation and effortless maintenance, this D-ring cable manager can satisfy them because having neatly organized and routed cables not only improves the appearance and accessibility of your rack, it also makes it easier for you to install, access and maintain rack components. As a consequence, we can see that it improves the appearance and accessibility of your rack. That’s why we want to have it.
How to Arrange Horizontal Cable Management with D-ring Cable Manager
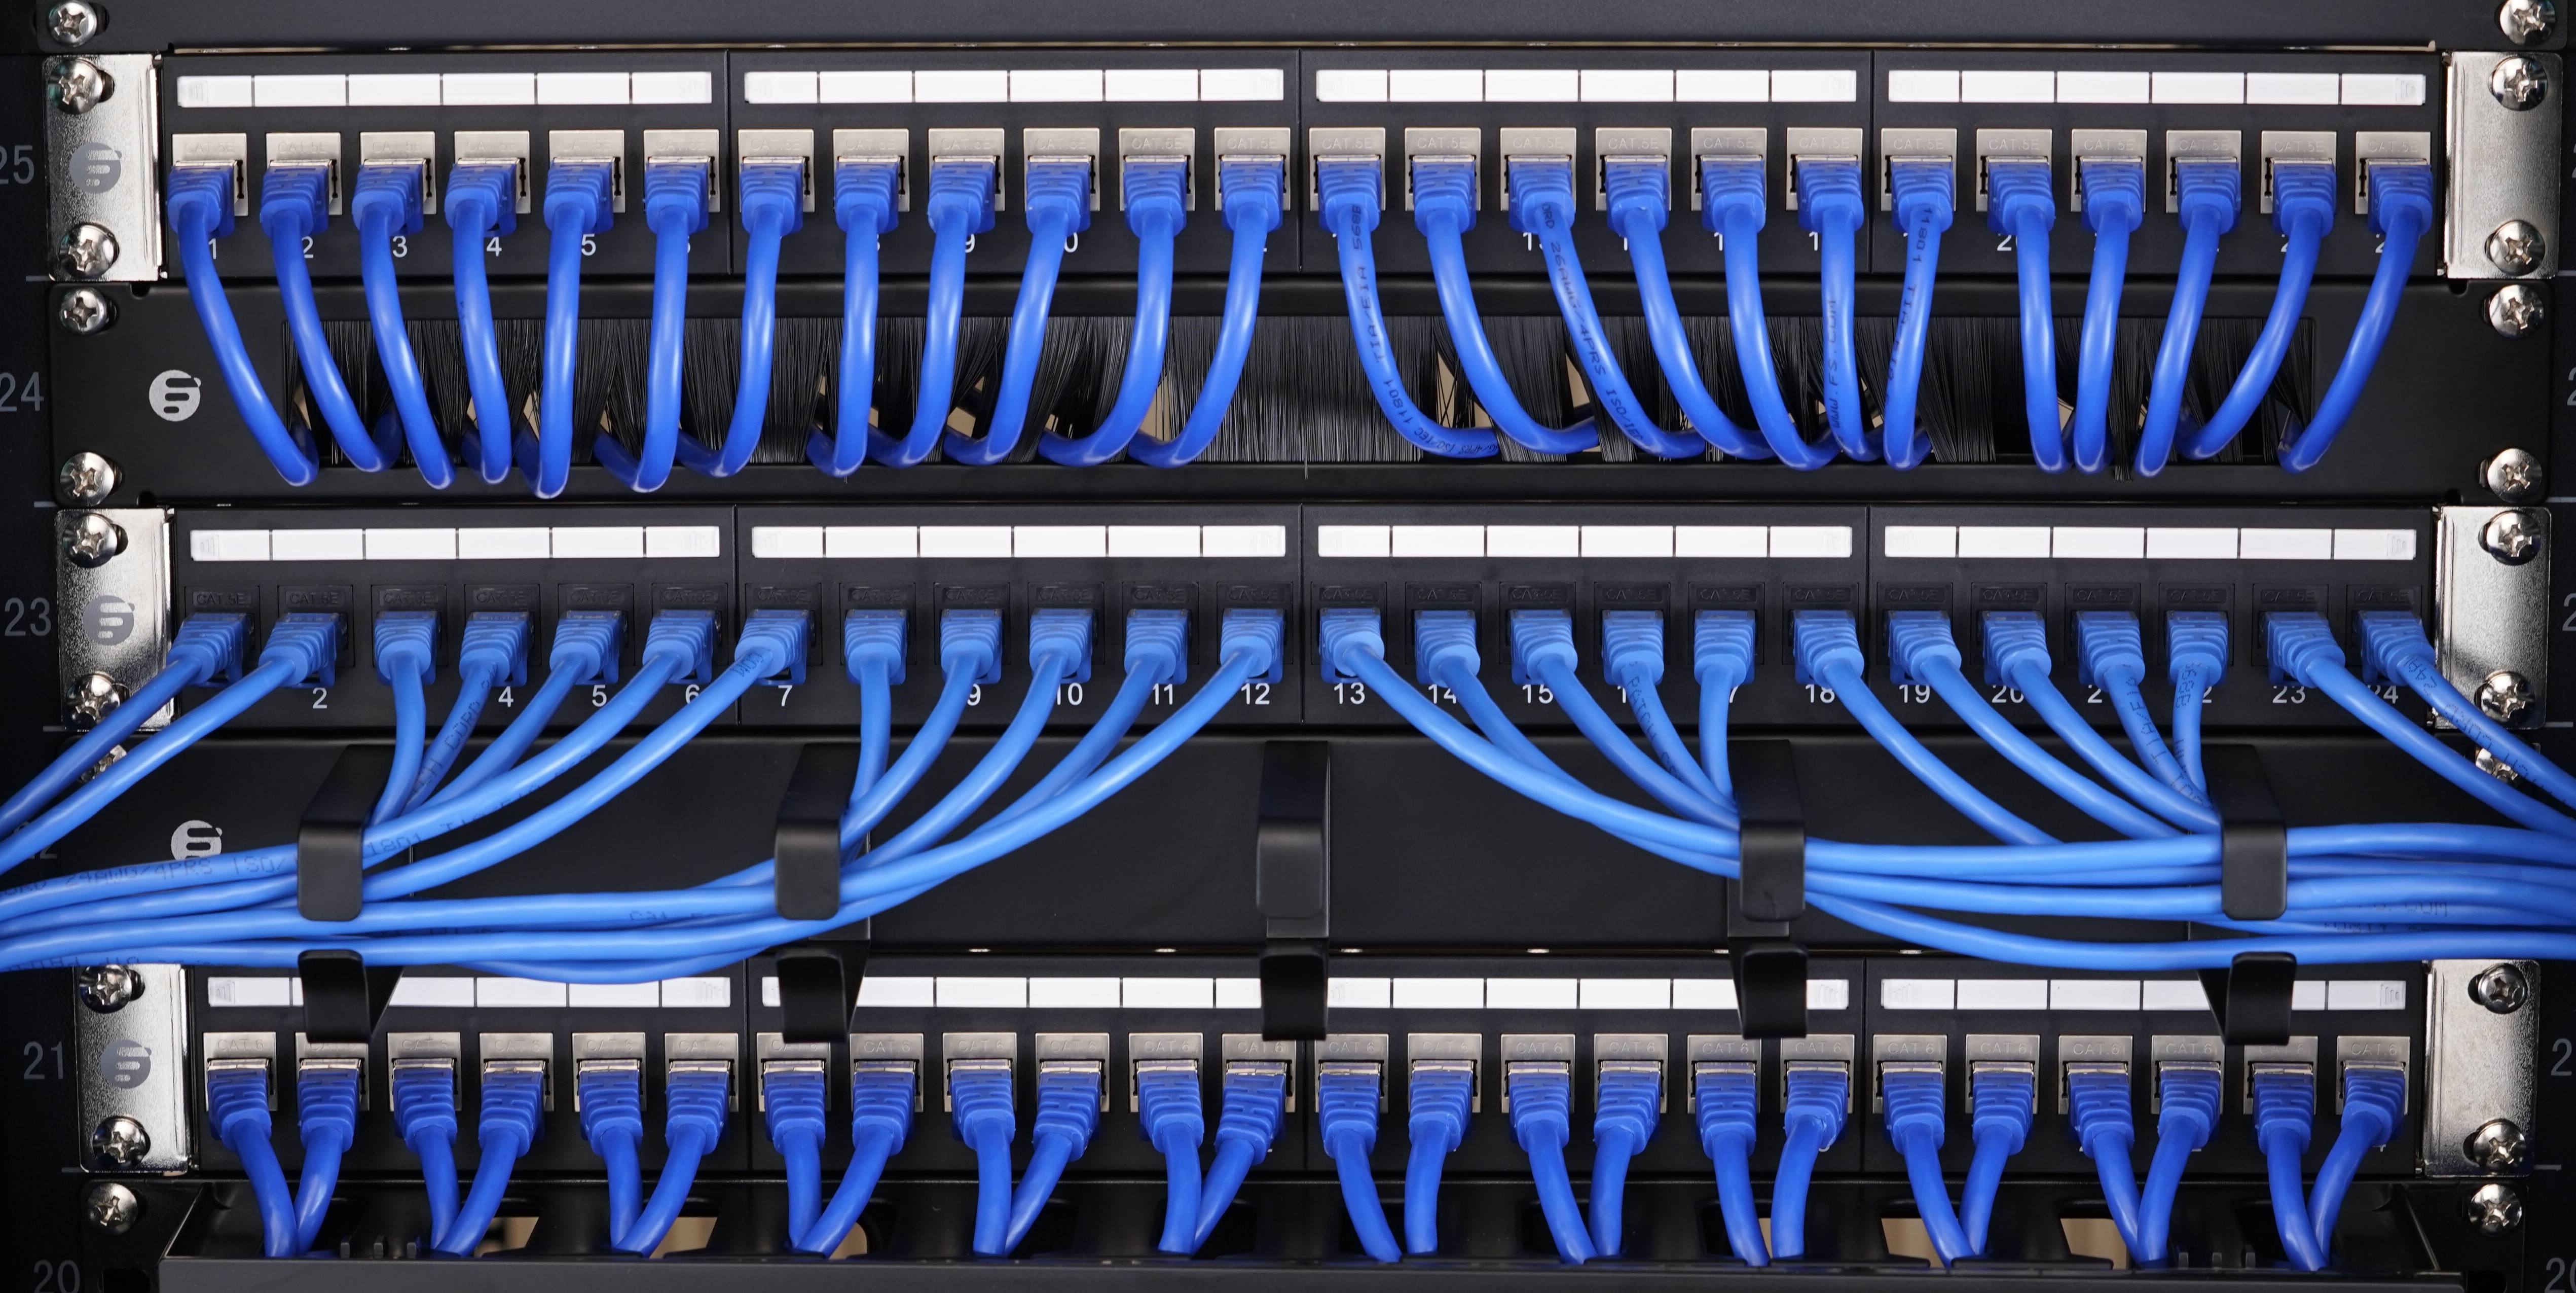
The user-friendly design makes it easy to use by customers and even novices. With screws and installing tools, you can attach this device onto server rack or cabinet. In the video, the cable managers are sitting below the switch. When the fiber cables on the switch are all on their position, we can now come to the cable management step. The first 4 fiber cables pass through the first ring and go through the second ring together with another 4 cables and so on. A single horizontal cable manager with D-rings can manage up to 70 patch cables. Here if you use cable ties to strap the cable, it will be the icing on the cake.
If you keep wondering where your power cords and video cables go in your 24 port patch panel, then our horizontal cable management panel with metal D-rings to provide stability so each cable can make a clean entry and exit. Make your patch panel look organized and professional. FS.COM horizontal cable management solutions provide data center managers and IT professionals with a variety of options.