Deploy Network in A New House

Network has changed our lifestyle and it has become an important part of our daily life. Therefore, home network deployment is a very common project. When it comes to the components required for the network deployment, many people would say Ethernet cable and router, without hesitation. However, when you start the project, you will find it is not that simple. To deploy network in a new house, future-proof cabling and cost-effective components are two essential elements. And this article will share some tips with you based on these two elements.

home network deployment

Run Conduit

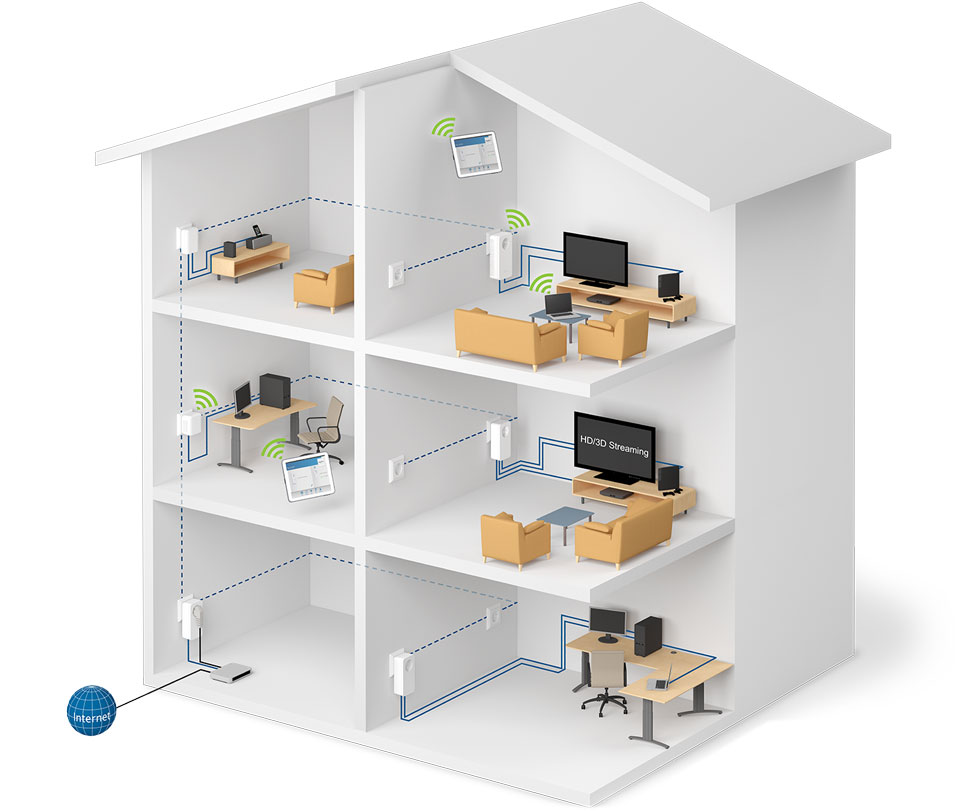
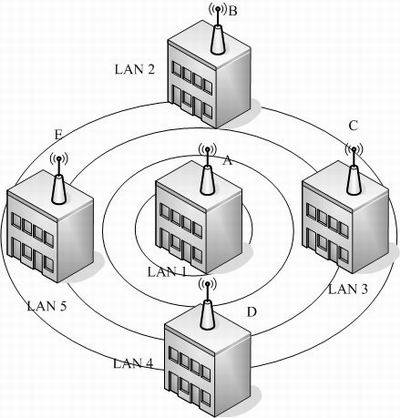
We know that conduit can protect cable from damage, in addition, it will allow you to pull new wiring in the future. No matter what wires you require in the future, you can easily replace them. Remember to run more conduit than you think you need. Run conduit to every room. Typically, run it to whichever wall you’re thinking of placing your equipment. Also, run it to locations in hallways and on floors where you may place future routers/access points for wireless networking. You will find that Power over Ethernet is useful for this.

Cat6 Cable Is Fine

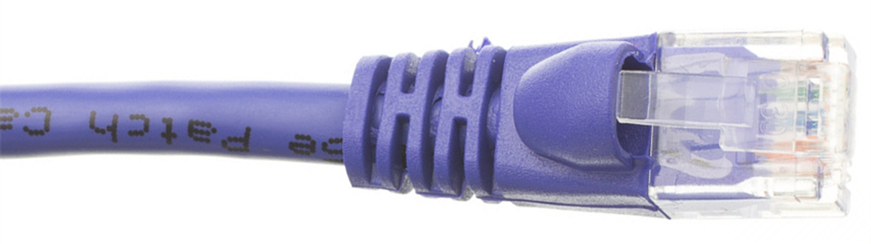
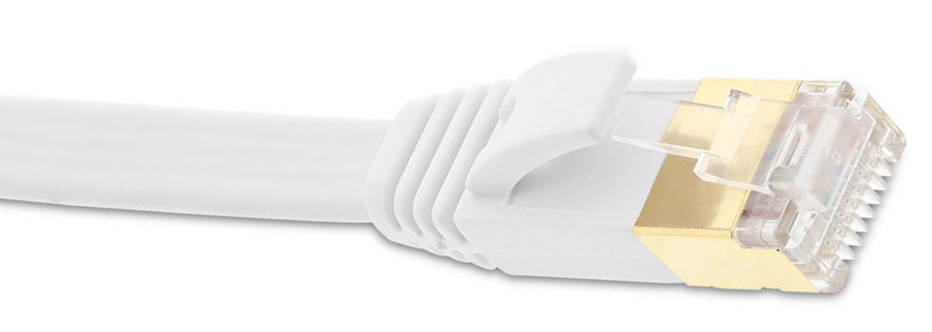
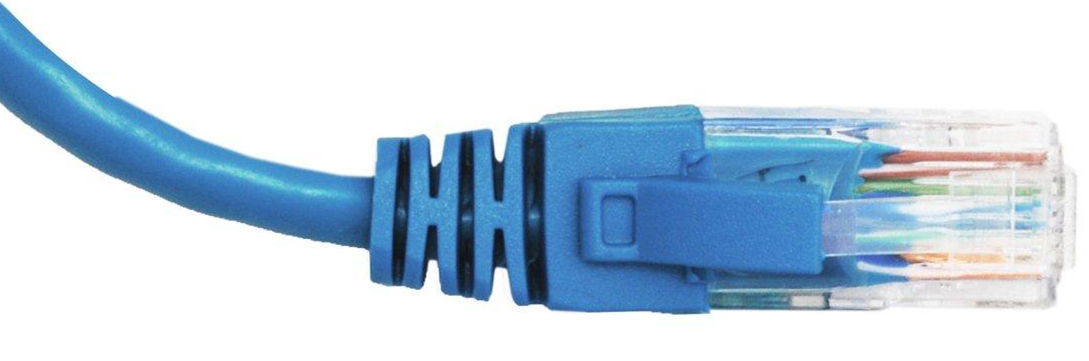
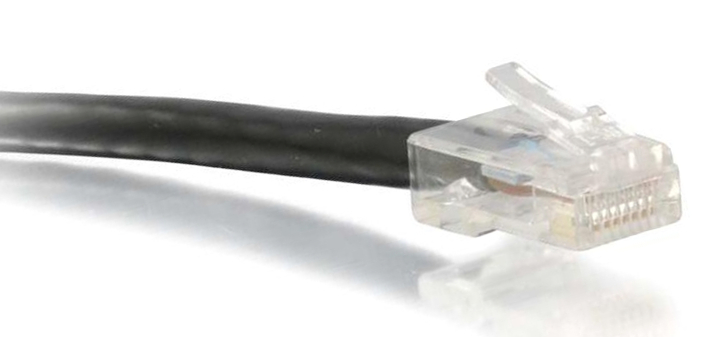
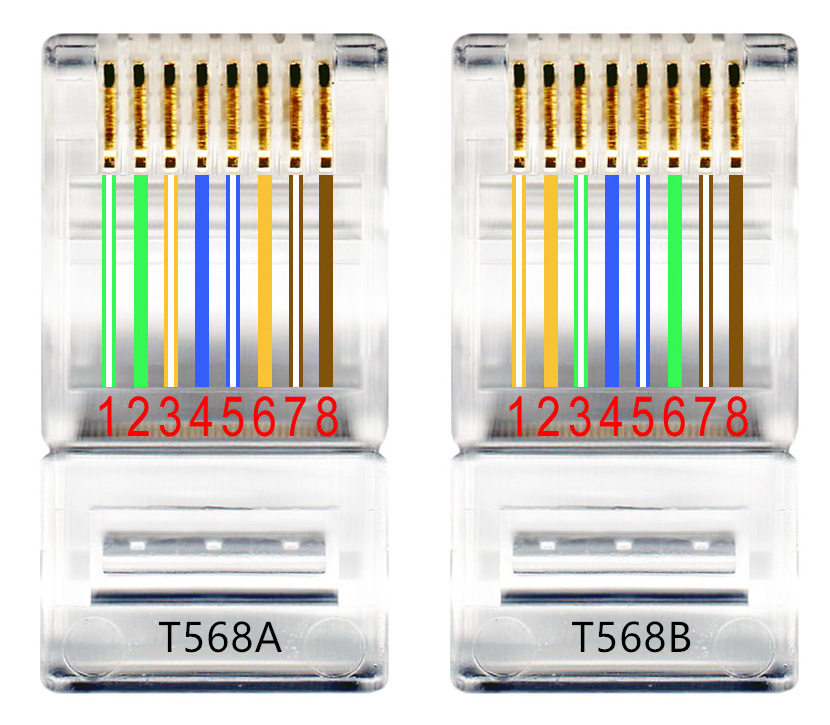
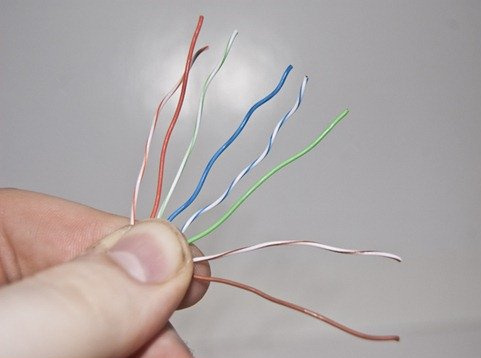
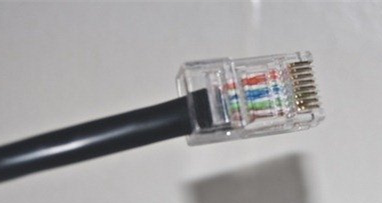
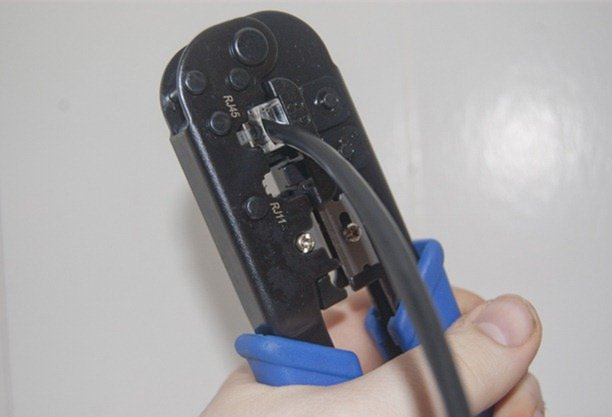
For Ethernet cable, Cat6 cable is fine for all current standards unless you have a giant mansion. Cat6 cable is a standardized twisted pair cable for Ethernet and it is backward compatible with the Cat3, Cat5 and Cat5e cable standards. In addition, Cat6 cable provides performance of up to 250 MHz and is suitable for 10BASE-T, 100BASE-TX (Fast Ethernet), 1000BASE-T/1000BASE-TX (Gigabit Ethernet), and 10GBASE-T (10-Gigabit Ethernet). For transmission distance, Cat6 cable can reach 100 meters for slower network speeds (up to 1,000 Mbps) and higher network speeds over short transmission distance—it can achieve only 55 meters at the speed of 10 Gbps and 33 meters in high crosstalk conditions. You only need Cat6a cable if you plan to run cable at 10 Gbps and longer than 55 meters (180 ft). Also, remember to have “extra” cables which will save you enormous hassle and expense.

Dual Band Router Will Be Better

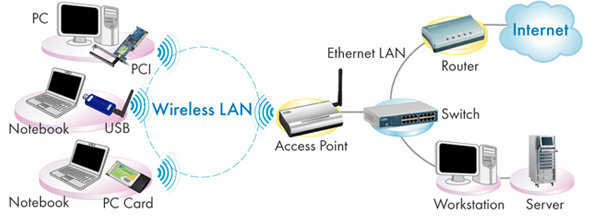
We know that wireless network utilizes either 2.4 GHz frequency band or 5 GHz frequency band. The 2.4 GHz wireless network covers a larger range than 5 GHz wireless network, but 5 GHz band can provide faster speed. In wireless home network, many older Wi-Fi devices do not support 5 GHz band. It is not difficult to find that 2.4 GHz and 5 GHz have their own advantages. As a result, dual band router will be better for your home network deployment.

Utilize PoE

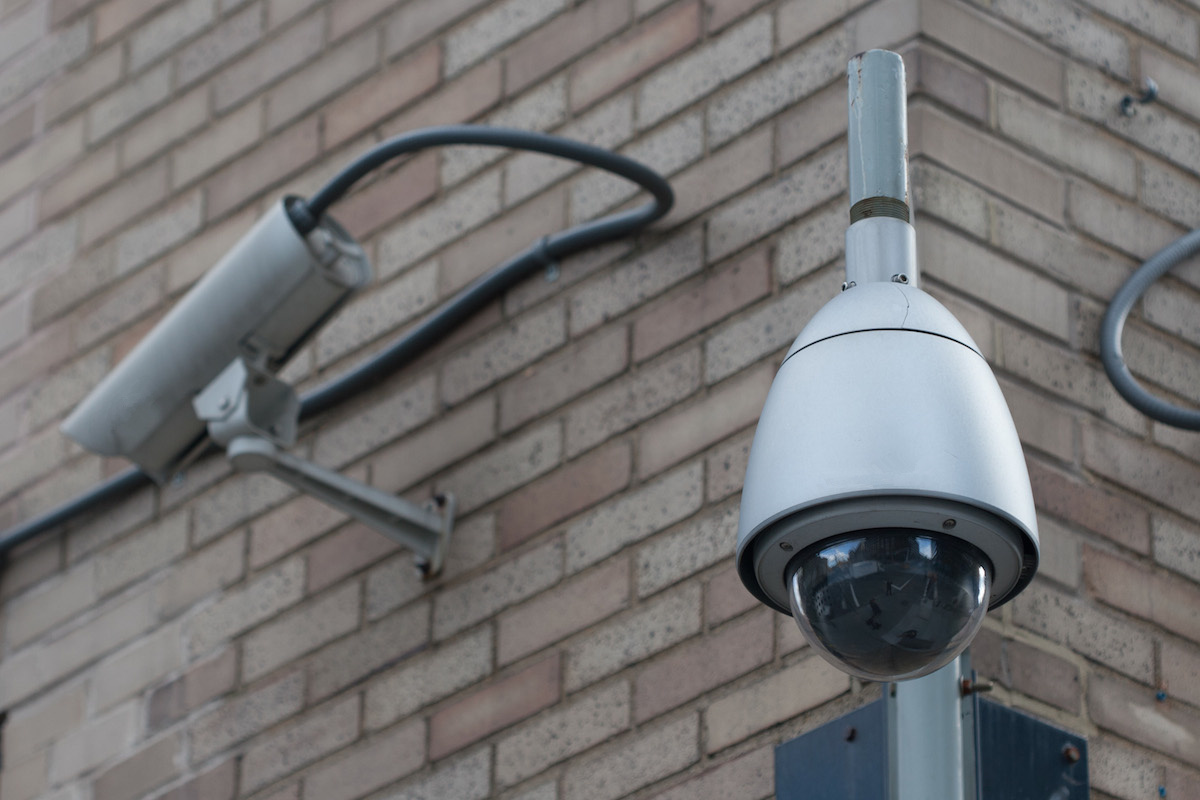
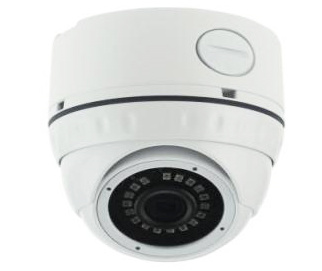
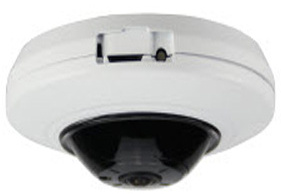
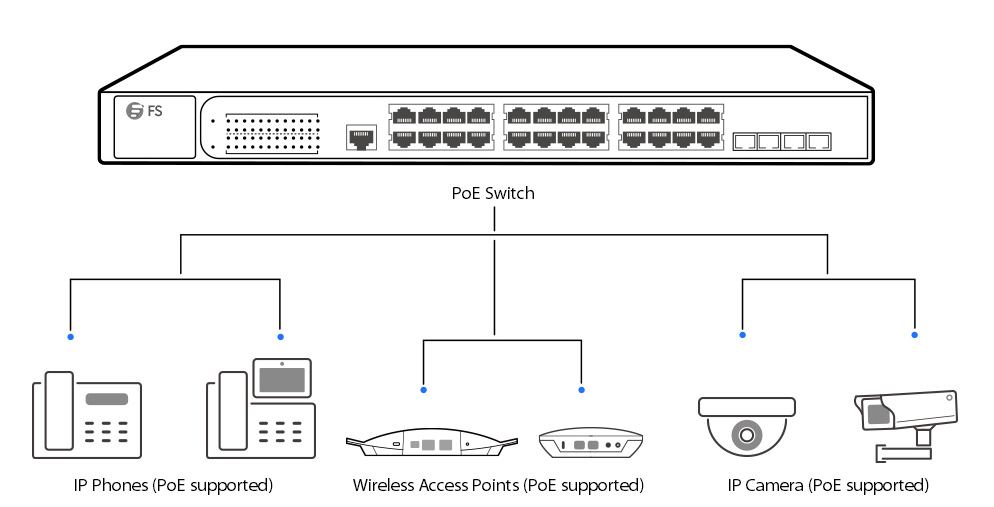
If you want to set up multiple access points and IP cameras, PoE technology is a good option that can realize the power and data transmission over the same Ethernet cable at the same time. PoE devices utilize the original PoE standard, IEEE 802.3af, which provides up to 15.4W of DC power to each device. In addition to wireless access point and IP camera, there are some other PoE devices on the market, such as IP phone and PoE switch.

PoE technology

Conclusion

In fact, once you have decided to deploy network in your new house, there will be a lot of things that you have to think about, such as which type conduit to run, how long cable to buy, where to place the router, how many access points to set up, which kind PoE switch to buy, and so on. But there is another important thing that you must pay attention to, that’s where to buy what you need. FS.COM can provide you high quality products at low price. For more details, you can visit our site.

Advantages and Disadvantages of Wireless Access Points

With more and more wireless Internet users, wireless Internet access has become a trend. A wireless access point (AP) is ubiquitous no matter in a family or a large department store. However, everything is imperfect, since advantages are always followed by disadvantages. This post will interpret the advantages & advantages of wireless access points respectively.

Advantages:
1. More users access

An ordinary wireless router can only support 10-20 users access, while AP is able to allow over 50 or even hundreds of users access, and what’s more, it has stronger ability to send and receive signals. Especially in a large area needing wireless coverage, an AP has more advantages than a wireless router.

2. Broader range of transmission

Generally, the range of signal transmission that a wireless router can cover is just dozens of meters, and if beyond this range, signal will be lost. Nevertheless, an AP can cover further distances, up to 100-300 meters, and the increase of wireless access point will extend signal coverage proportionally, which enables users to roam freely in the network. Especially for enterprises, their office space is usually larger, and even some need to communicate across the buildings, and the number of users accessing the network is so large that they need a larger wireless network coverage, thus avoiding management of cabling.

3. Flexible networking

It is known that except home networking, wireless networking in commercial locations often involves the use of many wireless devices, and different networking patterns should be adopted based on the environment and requirements. The networking mode of the wireless router is relatively single with low flexibility. On the contrary, an AP has a variety of modes for you to choose, which meant to be very flexible, such as Simplex AP, Wireless Client, Wireless Bridge, Multi-point Bridge, etc. and it can be managed in a centralized way with the cooperation of wireless AP controller.

4. Multi-AP interconnection

The enterprise can design the wireless program flexibly according to its actual situation. Multi-AP interconnection can give full play to its advantages. Multi-AP applications are typically found in businesses but rarely exposed at home. In the business, the coverage of single AP is limited, so in order to extend the coverage of wireless networks and allow clients to roam seamlessly in the network, multi-AP interconnection will be a favorite for an enterprise.

multi-APs interconnection

Disadvantages:
1. High cost

Some people think that wireless AP is a little bit expensive, because for enterprises, when the scale of enterprise wireless network is larger, the more wireless APs are needed, thus the higher cost that enterprises will undertake. So the priority for an enterprise is to control cost, which leads many people to be reluctant to use wireless AP, instead, they prefer using home wireless routers with lower performance.

2. Inability to be used alone

Now, many people would firstly think of wireless routers instead of wireless AP at the mention of building wireless networks, unless it’s a large hotel, or public places. The main reason is that a wireless AP can’t be used alone, can’t be directly connected to ADSL (Asymmetrical Digital Subscriber Loop) modem and it needs to be used in conjunction with other equipment like switches, controllers, ethernet hubs, etc. Therefore, many people would find it very troublesome and less convenient as a wireless router.

WiFi-AP can't be used alone

3. Poor stability

Poor stability is aiming at cable networks. Wireless networks take air as transmission medium while cable networks take cables as transmission medium. It’s not difficult to know that the cable network is faster and more stable than wireless network. Wireless AP only functions well when failing to build a cable network.

Conclusion

Wireless AP and wireless router are facing different targeted groups, a wireless router is aimed mainly at home users and students with low cost and good performance, and it’s able to meet the basic needs of the general family users. Wireless AP is mainly for business users, and its transmission range is wider and broader, it supports more users access, and has stronger signal sending and receiving capability. At the same time, it also has better safety performance, of course, the price will be far more expensive accordingly.

Related Article:Key Components to Form a Structured Cabling System

Power over Ethernet Technology & PoE Switch Explained

Importance of Plug Boot For RJ45 Cables

Network cable with RJ45 connectors is widely applied to our life. When choosing the RJ45 Ethernet network cables, you may discover that these cables have different appearances of their cable plugs. For example, some cables will have a rubber thing on the clip while some don’t. Why do RJ45 cables have such design and what is the function? This post is going to present the basic knowledge about the RJ45 boot.

What Is Plug Boot for RJ45 Cable?

This rubber thing is known as plug boot. A booted cable has the plug boot on the Ethernet patch cable end of the connector. You can find two main types of boots on the market. One is the separate boot that can be purchased individually to put on the cable, and the other is the injection molded boot to be bought together with the cable. Of course, the latter is stronger to provide support for the cable when the connector is being pulled out of a switch, patch panel or other devices. Non-booted cables will not have the plug boot as the protection, which is easier to be damaged.

cable with RJ45 boot

Functions of RJ45 Boot

Generally speaking, the RJ45 boot design has two purposes. Firstly, the plug boot can prevent the connector clip from flipping up or even breaking off from the cable. When the plastic clip is broken, cable won’t be able to firmly connect to the network which will then interrupt the data transaction. Secondly, using the booted cable is also a protection for your own nails. Because the clip is slim and small, it is easy to stick into the nails during the installation or removal of RJ45 cable. Hence, for the better protection of both cable connector and your nails, Ethernet cables with plug boots are a great solution.

Several Types of RJ45 Boot

If you want to buy the booted cables, you should also consider which type of boot is the best fit for your network since plug boot also has different constructions. Here will introduce the common types of plug boots.

Standard RJ45 Boot

The standard boot looks like the half of a dome. It protects the clip on all sides and prevents it from snagging or breaking off. This is the type widely applied to cable installation through floors or walls.

standard boot

Molded RJ45 Boot

The molded boot does not protect the locking clip. It is easy to plug in and out. This type of boot is suitable for hard-to-access space where cables are seldom plugged or unplugged.

molded boot

Snagless RJ45 Boot

Snagless boot has a small flap to protect the RJ45 clip. It is often used in applications where there are high insertion cycles in easy-to-access space.

snagless boot

Slim RJ45 Boot

The slim boot has a 28% reduction in diameter than the Snagless boot. It offers minimal protection and is easy to plug or unplug. This type of booted cable is usually seen in high-density applications.

slim boot

No Boot

Non-booted RJ45 cable is much easier for plugging or unplugging, but the whole connector is exposed with no protection. This type is typically used for applications that don’t require frequent unplugging.

no boot

Conclusion

In summary, if you want to have better protection for your Ethernet cable, using RJ45 boot is an ideal solution. If the application does not demand too much cable shifting, non-booted cables are also acceptable. No matter which type of RJ45 cable you choose, the decision must be made according to your own project.

Related Article: 

Ethernet Cable Jacket Ratings: CM vs. CMR vs. CMP
Introduction of the RJ45 Interface
How to Terminate and Install Cat5e, Cat6 Keystone Jacks?

Let Surveillance Camera Guard Your Home Safety

As we all know, surveillance refers to the monitoring of the behavior, activities, or other changing information, usually of people for the purpose of influencing, managing, directing, or especially protecting them. Nowadays, surveillance camera has been widely used in every corner of the world. As a helpful electronic equipment, it can observe the surroundings from a distance. People are feeling more secured under the supervision of surveillance camera. If you want to take fully control of your personal space, installing the surveillance camera can be a good choice.

surveillance camera

The Importance of Surveillance Camera

A security system is very necessary because you can not predict a crime. In today’s society, burglars are always rampant and causing great loss to innocent people. Fortunately, surveillance camera provides help to catch these unexpected intruders instantly. If your place has already been stolen, surveillance camera can also record the crime scene and help police identify and find the criminal. The deployment of surveillance camera has greatly improved the home security and decreased people’s loss to the minimum.

What Else Can It Achieve for Your Home?

When you are not at home, surveillance camera can watch the house for you. You are able to catch the intruder on the recording tape when they break in. Apart from catching criminals, surveillance camera can also secure the family members for you. If you have pets or kids at home, you can check the camera to see if they are alright. Surveillance camera is also helpful to keep an eye on the nanny or babysitter since child abuse often occurs under such circumstance.

However, this does not mean surveillance camera is not necessary when you stay at home. It can still be useful for you to see who is at the front door of your house (especially at night). Moreover, you can use it to monitor the family members at different rooms in case accidents happen. Surveillance camera helps you to detect emergency right on the spot, and enables you to deal with it in time.

Three Types of Surveillance Cameras

Dome IP camera is a type of IP camera with dome cover. The lens of the camera is either fixed or vari-focal. Some has infrared lighting and can be designed with vandal-resistant material. The exterior of dome IP camera seems to be more aesthetic.

dome-ip-camera

360 Dome Camera can capture images around the camera lens in all directions. There are different video modes for the camera, such as fisheye mode, panorama mode, double panorama mode, quad/single PTZ(pan-tilt-zoom) mode, and four stream mode. It is ideal for wide open areas to shoot the whole scene.

360-dome-camera

Bullet camera evolved from the box camera and is built into a permanently sealed weatherproof enclosure. The camera is wall-mountable for both indoor and outdoor use.

bullet-ip-cameras

Where to Place Surveillance Camera?

Here are some places recommended for you to install the surveillance camera at home. First is the front and back doors of the house. These are the best places to catch a burglar, and the back door is as important as the front door. Second is the area with high foot traffic. Intruders may also turn to these areas to enter the house. Third is the bedroom. This is always the place where burglar wants to steal first and you can also look after the children when you are away. Additionally, do not forget to point the camera in the right direction if the lens can not catch the whole scene or controlled by you.

How to Maintain Surveillance Camera?

Maintaining the surveillance camera is of same importance if you want to extend its service life. The camera does not need too much care, but the following maintenance tips are usually necessary.

  • Make sure the camera is clean. Wipe your camera as a routine will ensure the dust won’t affect the video effects.
  • Pay attention to the elements that may block camera’s view. For example, trees or furniture around the house may be the obstacles of your camera.
  • Be aware of bad weathers. Your camera must be waterproofed if it is for outdoor application. Still remember to check the camera is functioning normally under heavy rains or snowstorm.
Conclusion

Using surveillance camera at home greatly improves the security of family. Sometimes, having a camera may also scare off the intruders. More and more people are choosing surveillance cameras to protect their homes. Are you ready to get one?

How to DIY Ethernet Cables?

Buying the Ethernet cable in stores is probably a common way for average people. However, have you ever met the problem that the cable length is too long or too short? It is so difficult to find the most appropriate cable length at ordinary stores for your network. Especially when the cable is too long, the extra length may end up becoming a mess at your place. In order to solve this issue, why not DIY Ethernet Cable? You can create your desired length and the procedures are fairly simple. This post will guide you to make a DIY Ethernet cable.

Essential Tools and Materials

Before you get started, there are some necessary tools and materials needed during the procedure. Wire cutter or wire stripper is used for the task of cutting and stripping wires. RJ45 cable crimping tool can make your cable’s data plug a permanent part of your new cable. RJ45 data plugs are important materials which can be found at many cable stores. Some plugs are labeled specifically Cat 6 or Cat 5e, you can buy specific ones if your network needs one or the other. And you should prepare the bulk Cat 5, Cat 5e, Cat 6 or other Ethernet cables according to your needs. Sometimes, having a cable tester is better since it will save time and prevent headaches down the line when you have a problem with a cable or connection.

Which Wiring Schemes?

Ethernet cables have several standard wiring schemes. T568A and T568B are the common wiring schemes which define the order of the individual wires and pin-outs for eight-pin modular connectors and jacks. If the cable is used for home-networking connections, T568B wiring scheme is recommended. T568A wiring scheme may be employed for the preexisting residential network wiring or other similar projects. The following figure presents the different wiring orders of T568A and T568B.

t568a-t568b-wiring-schemes

DIY Ethernet Cable Steps

After all the preparations, now you are ready to make your own Ethernet cable. Follow these DIY Ethernet cable steps and you will soon have your first self-made cable.

    • Step 1, measure the cable to the proper length you want. And don’t forget to add an inch or two because you may lose a bit of cable during the process. Then use the tool to cut down the cable.

DIY Ethernet Cable

    • Step 2, remove the outer jacket of the cable. A good way to do so is to cut lengthwise with snips or a knife along the side of the cable, away from yourself, about an inch toward the open end. Also leave an inch to an inch and a half if you are green hand.

strip-the-cable-jacket

    • Step 3, untwist and straighten the wires, then arrange the wires into the desired scheme order.

wire-the-cable-into-specific-order

    • Step 4, once your wires are in the correct order, trim the excess away. Only leave slightly less wire to be fit inside the RJ45 clip. And hold the wires in place with your fingers and insert them all at once into the data plug.

install-cable-into-plug

    • Step 5, place your data plug into your crimping tool and give it a firm squeeze. And you just finally complete your Ethernet cable.

cimp-data-plug

Conclusion

If condition permits, using the cable tester to test the Ethernet cable before installation is recommended. Getting this new skill, you will no more worry about the cable length, you can make them as long or as short as you want. Enjoy using your DIY Ethernet cable!

Related Article:

RJ45 Cat5e cable, How to Crimp It?

How to Wire Cat5e Ethernet Cable